
Fixing one problem on an old pickup always seems to reveal the next one. After recently replacing a few radiator hoses and topping off the coolant, I spotted a few small leaks at the top of the radiator. Time to retire the old OEM brass and copper unit before it caused more problems.
The Replacement
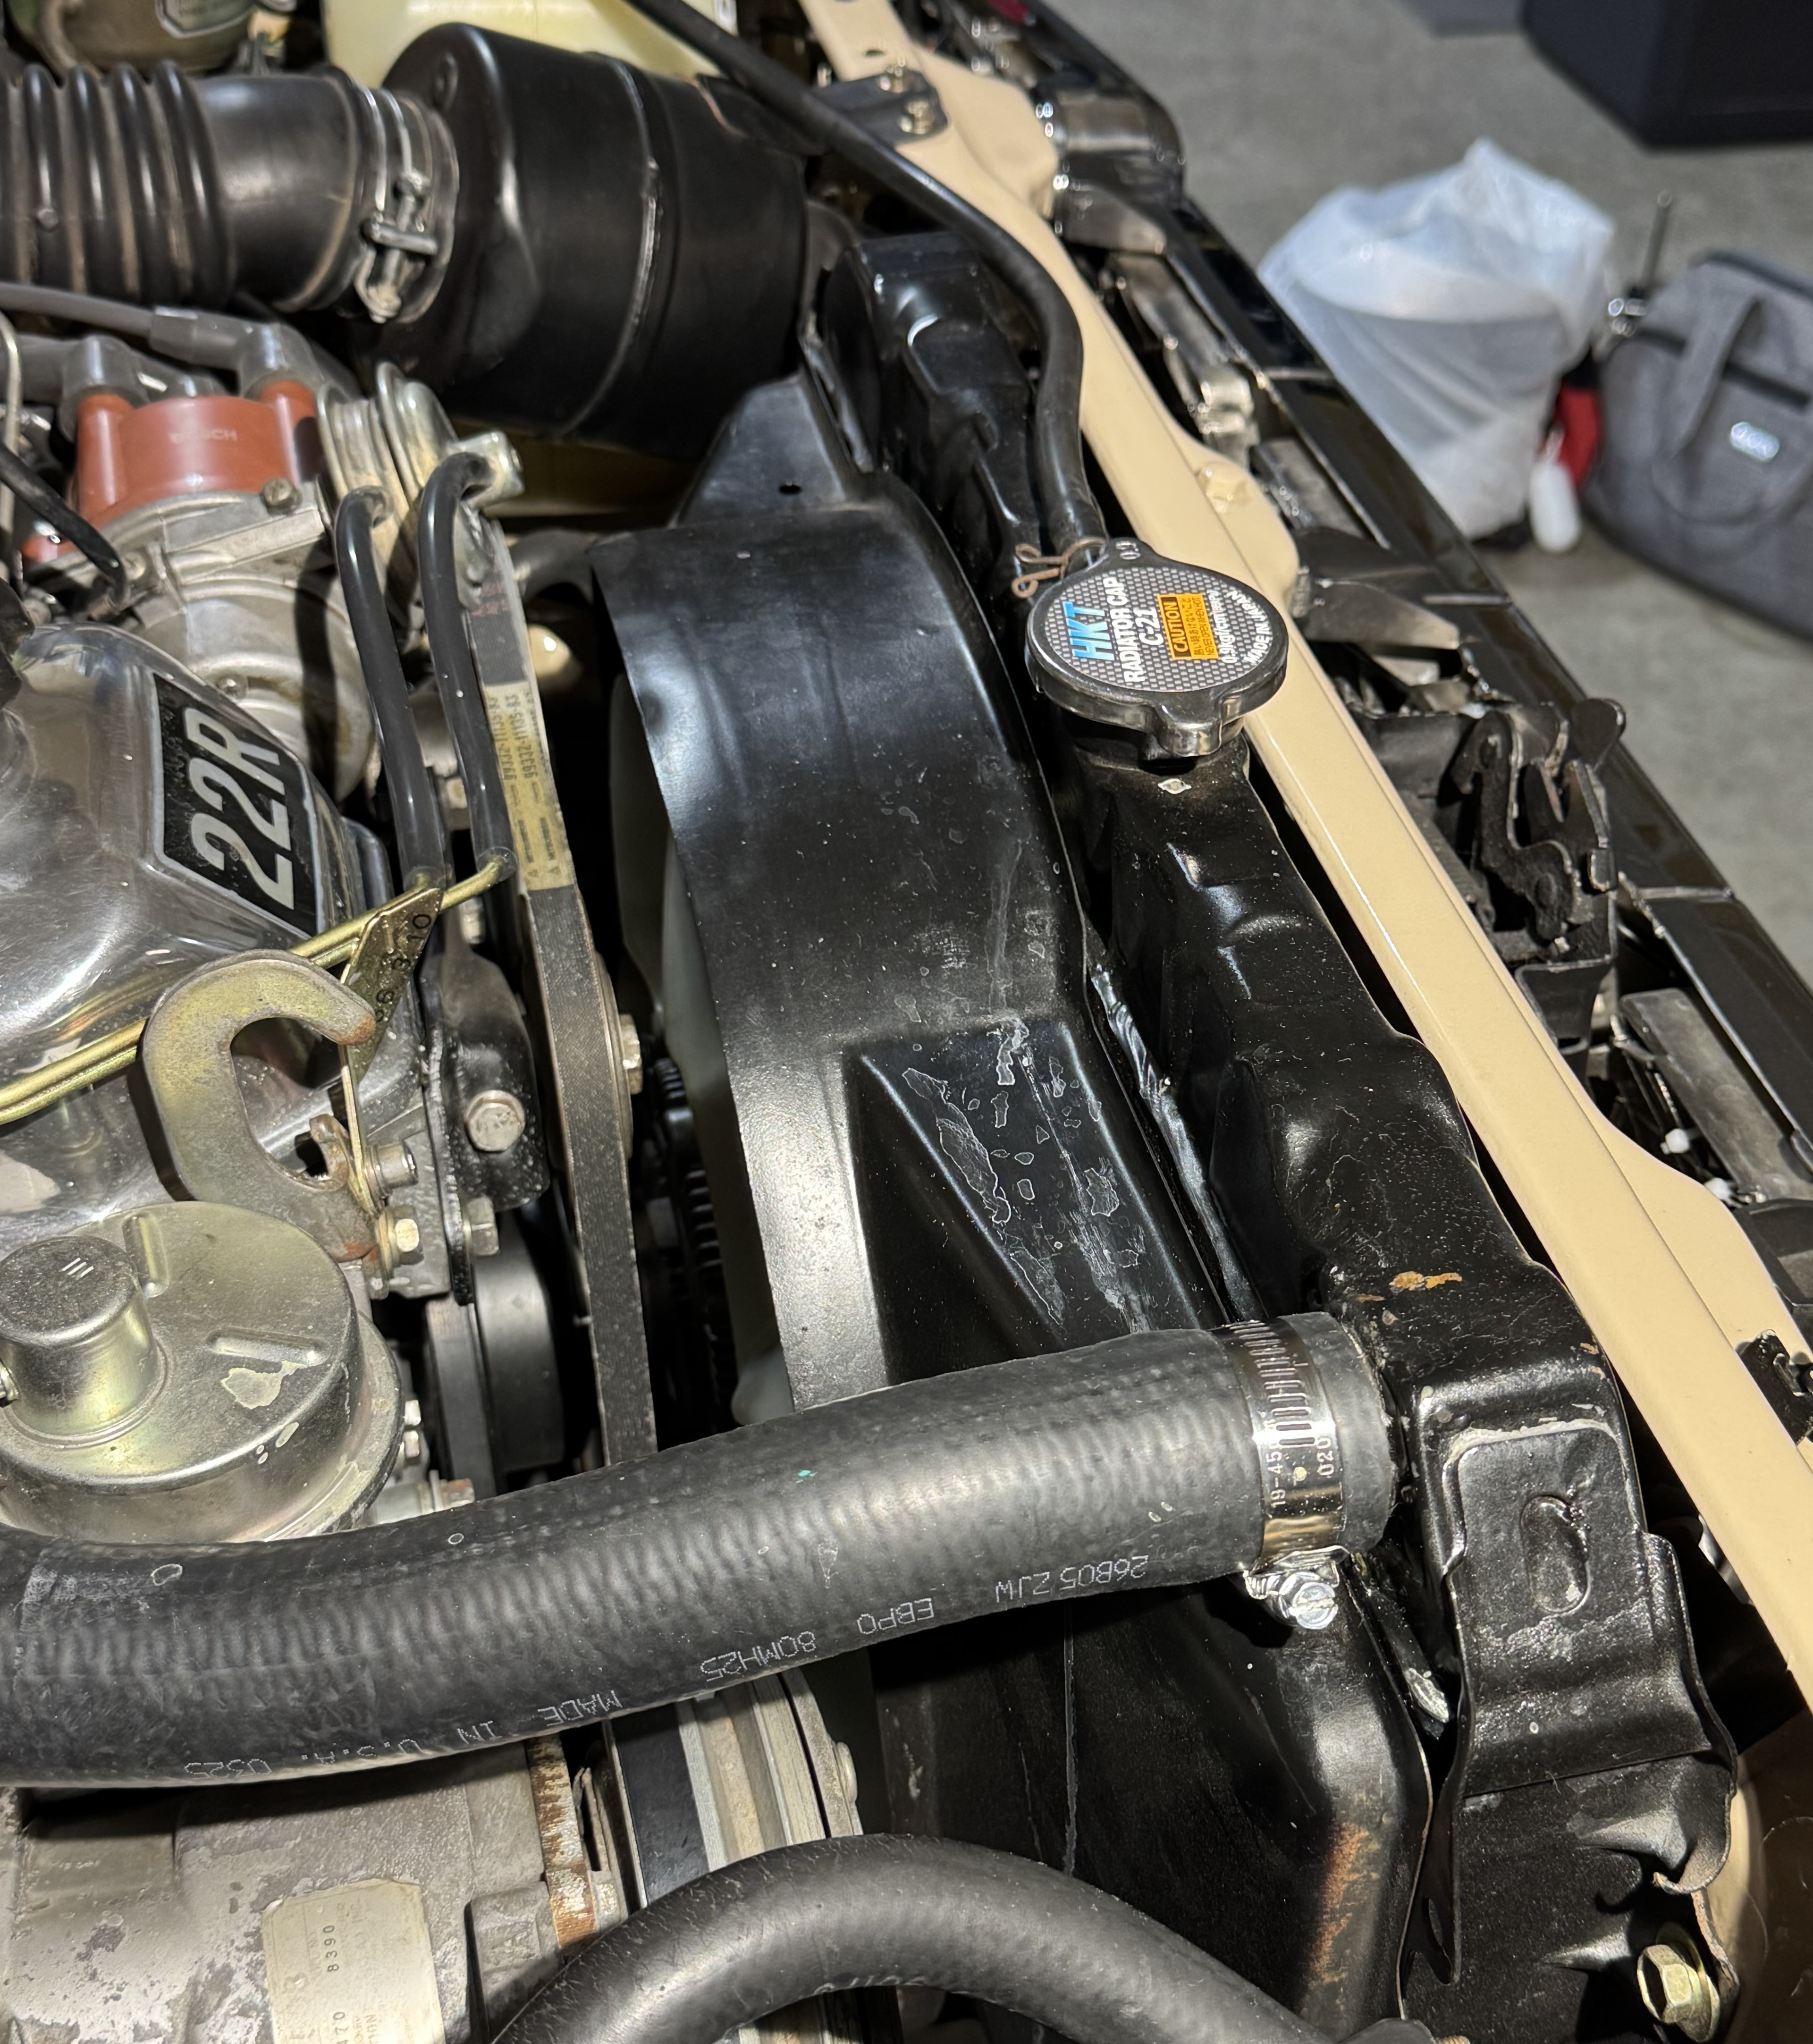
Leaning on the wisdom of my buddy Kevin over at pnw_toyota_4wd, he recommended going with a CSF 2314 for my 1982 Toyota. The good news is that this particular radiator has more cooling power courtesy of three rows of tubes running through the radiator’s core. The OEM radiator had just two. The metal tabs on the radiator that provide the mounting points to the truck and the fan shroud also matched up perfectly to the old radiator. Note that this radiator uses a smaller filler cap, which is not included, so you will want to pick up the CSF 4502 cap with your order.
Unfortunately, more rows of tubes (aka “cores) will result in a thicker radiator. I didn’t fully realize how much of a challenge this would be until I was trying to shoehorn everything back together with no luck. More on that in a moment.
The Removal
The removal of the old radiator was pretty straightforward. It consists of little more than draining the coolant from the drain cock at the bottom of the radiator into a bucket, then removing both the upper and lower radiator hoses. There will inevitably be some drips of coolant, so be prepared. I laid down cardboard on the concrete and had paper towels and rags handy. This was all too familiar to me because I just drained the system the week prior to replace the radiator hoses. Proof that the order that things are fixed doesn’t always make sense.
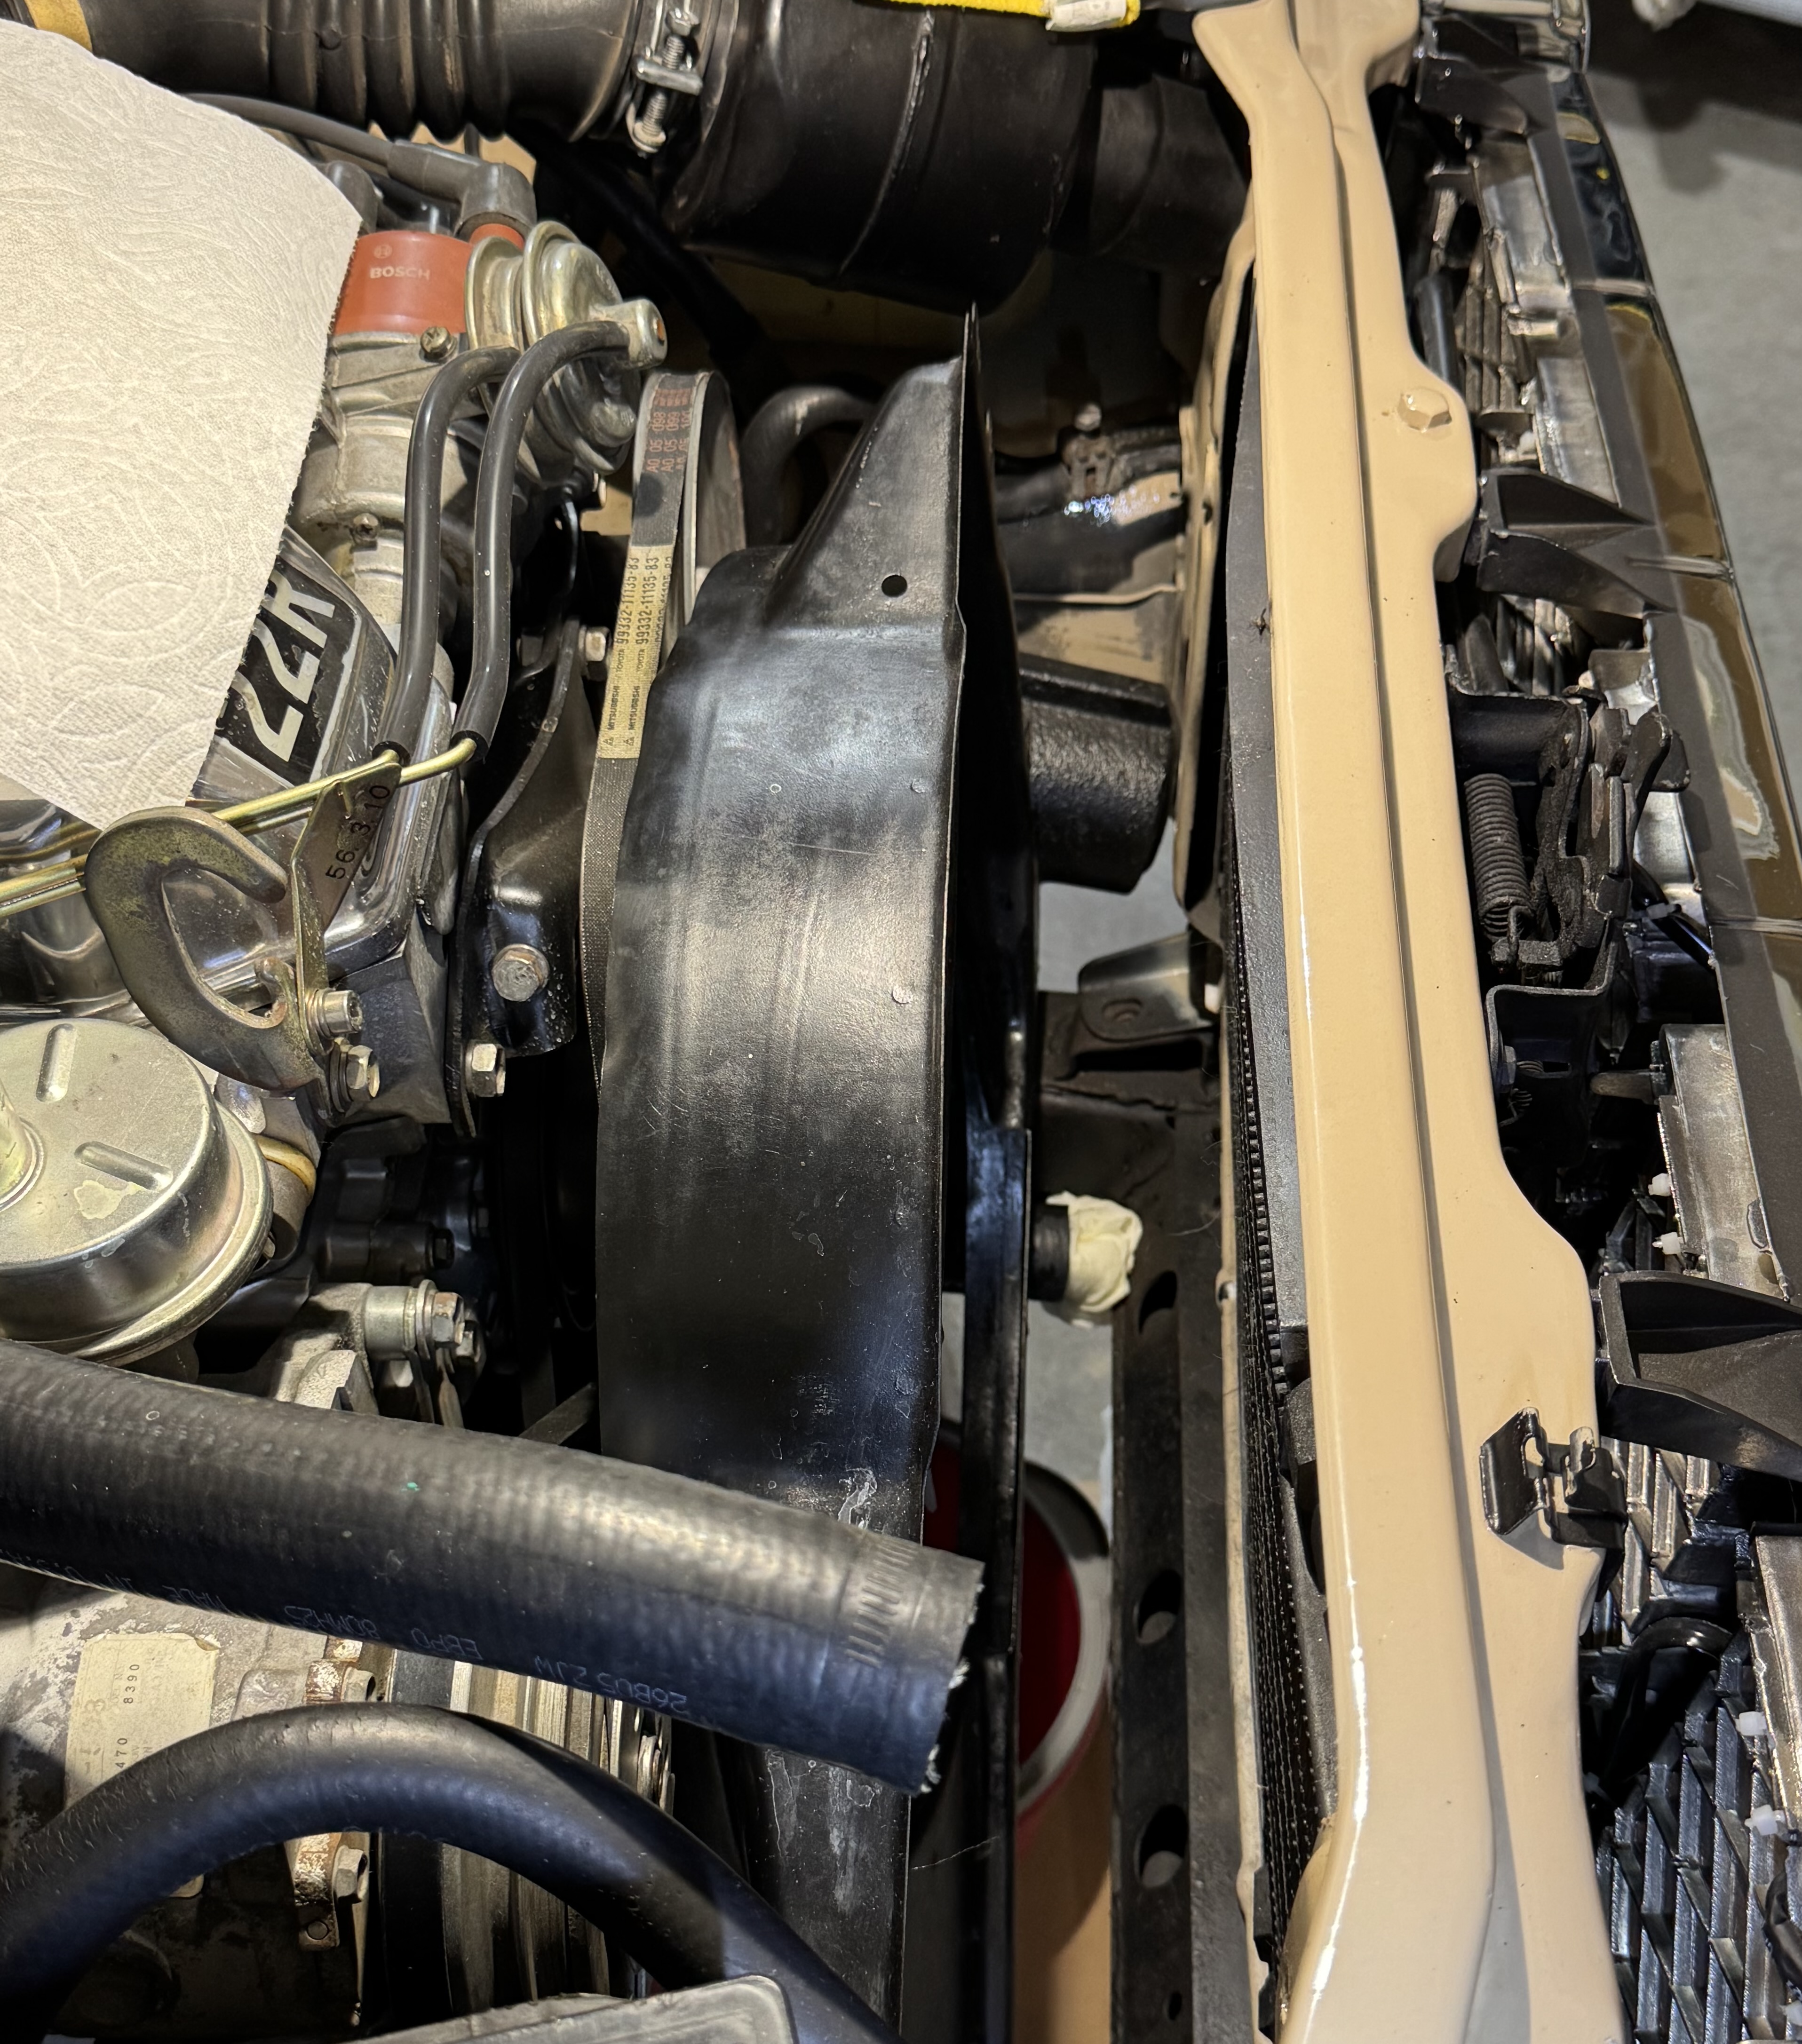
Next, I removed the fan shroud by slipping it in between the fan and the old radiator. If that seems a bit tight, hang it over the fan temporarily while you unfasten and remove the old radiator, as shown below.
The Pre Installation Comparison and Retrofitting
Face-on, the two radiators look almost identical. The new CSF unit even has the same mounting tabs. However, it’s noticeably thicker — approaching an inch deeper — thanks to the extra row of tubes. You will notice that the new radiator has two additional nipples on the bottom. These are for an optional transmission cooler. I used some vacuum line caps on them, since they will not be used in this installation.
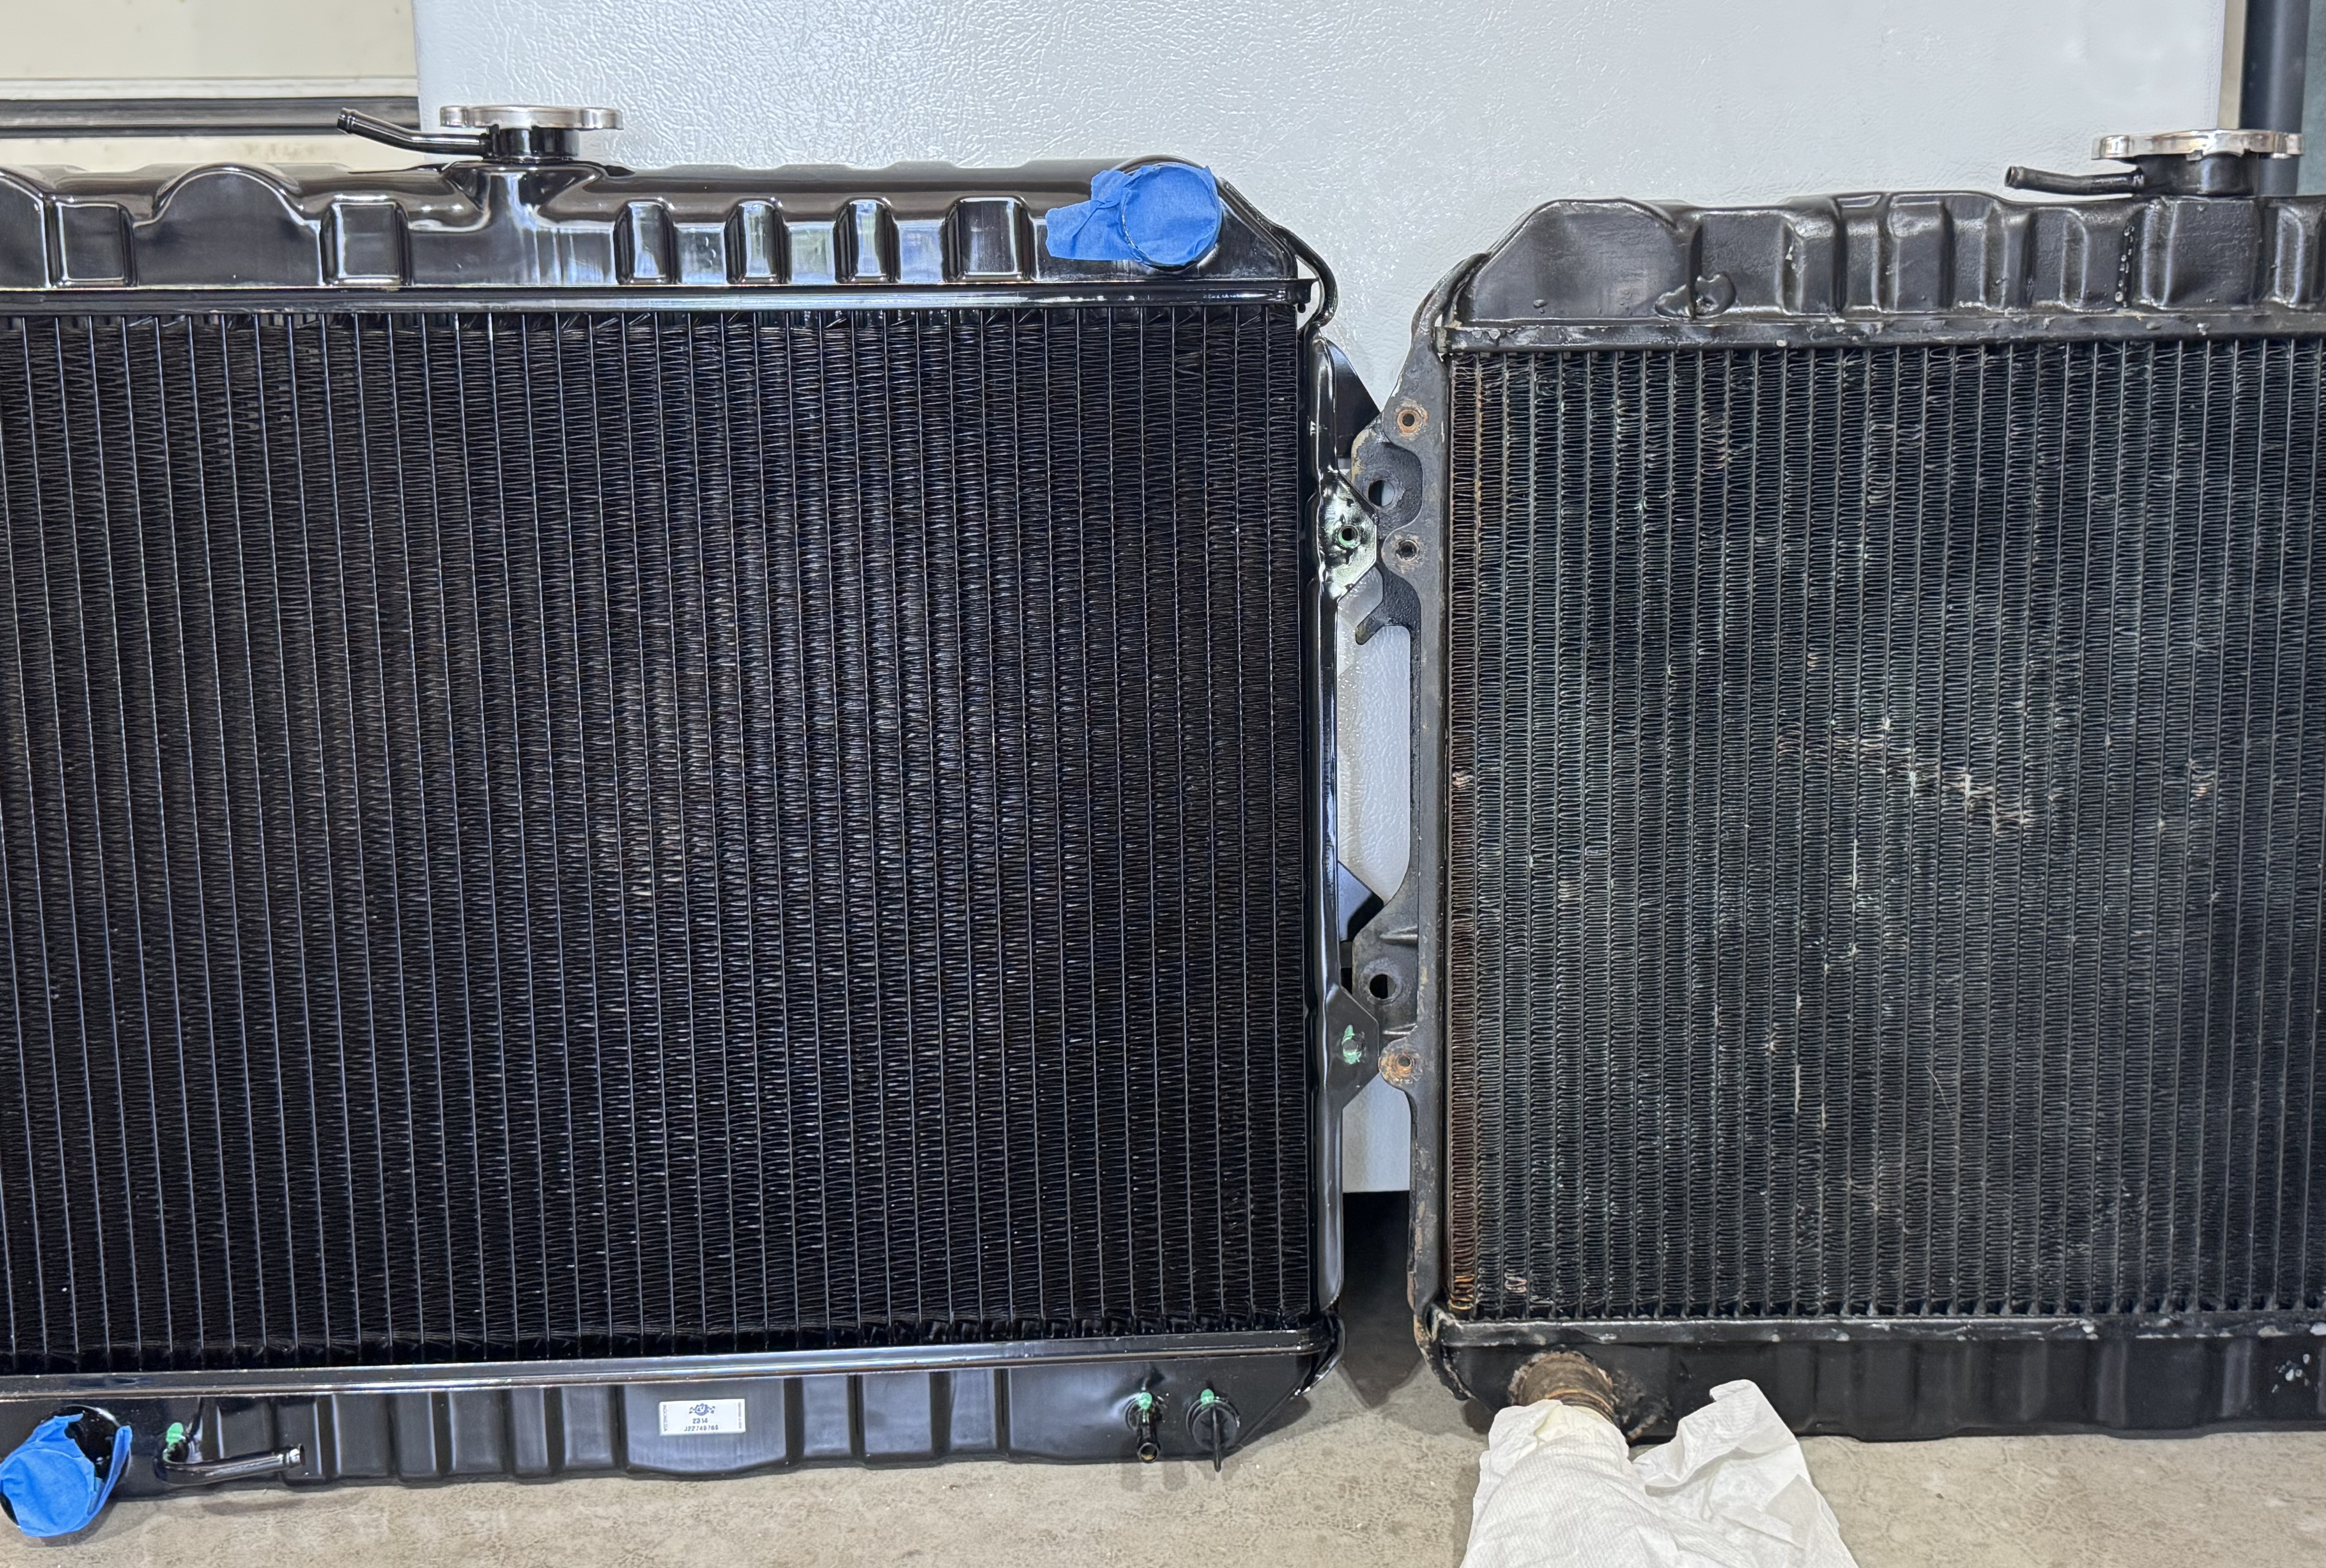
But two differences in the new radiator caused fitment challenges:
- The core is noticeably thicker.
- The top and bottom portion of the new radiator protrude farther outward than the cooling fins, so the fan shroud no longer sits flush.
Below we see the old radiator and shroud.
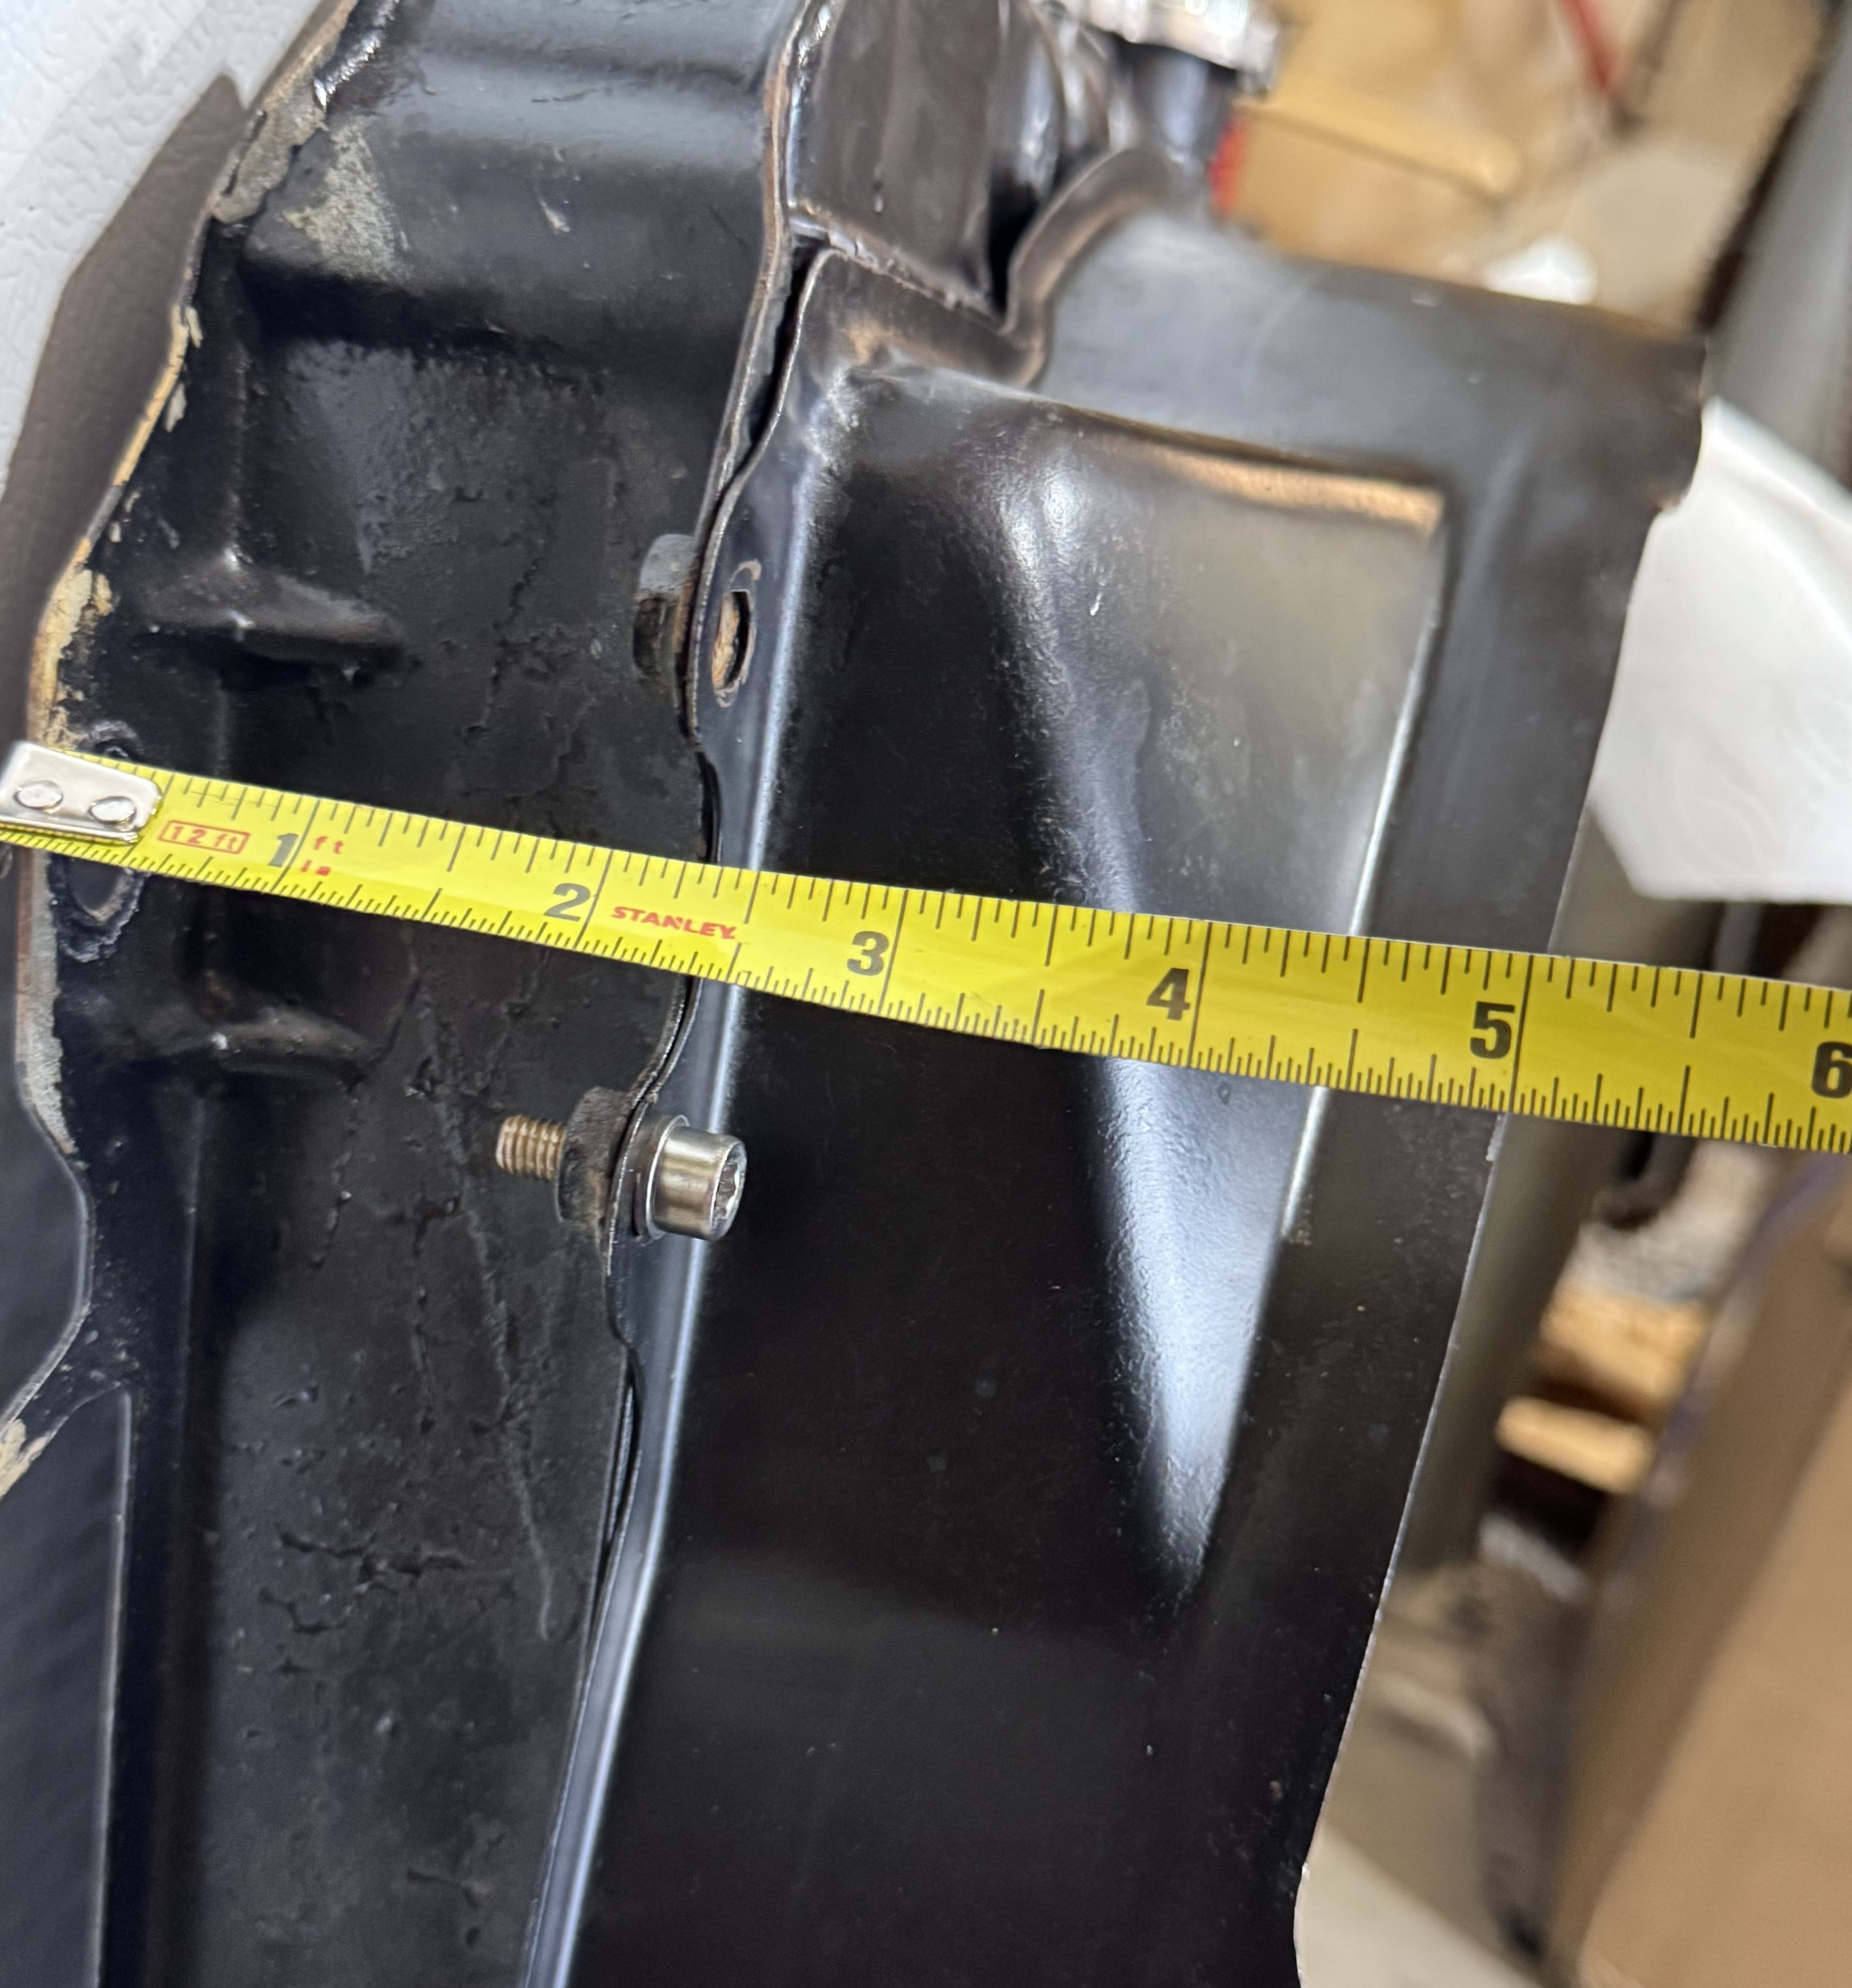
Now let’s compare it to the new radiator with the old shroud.
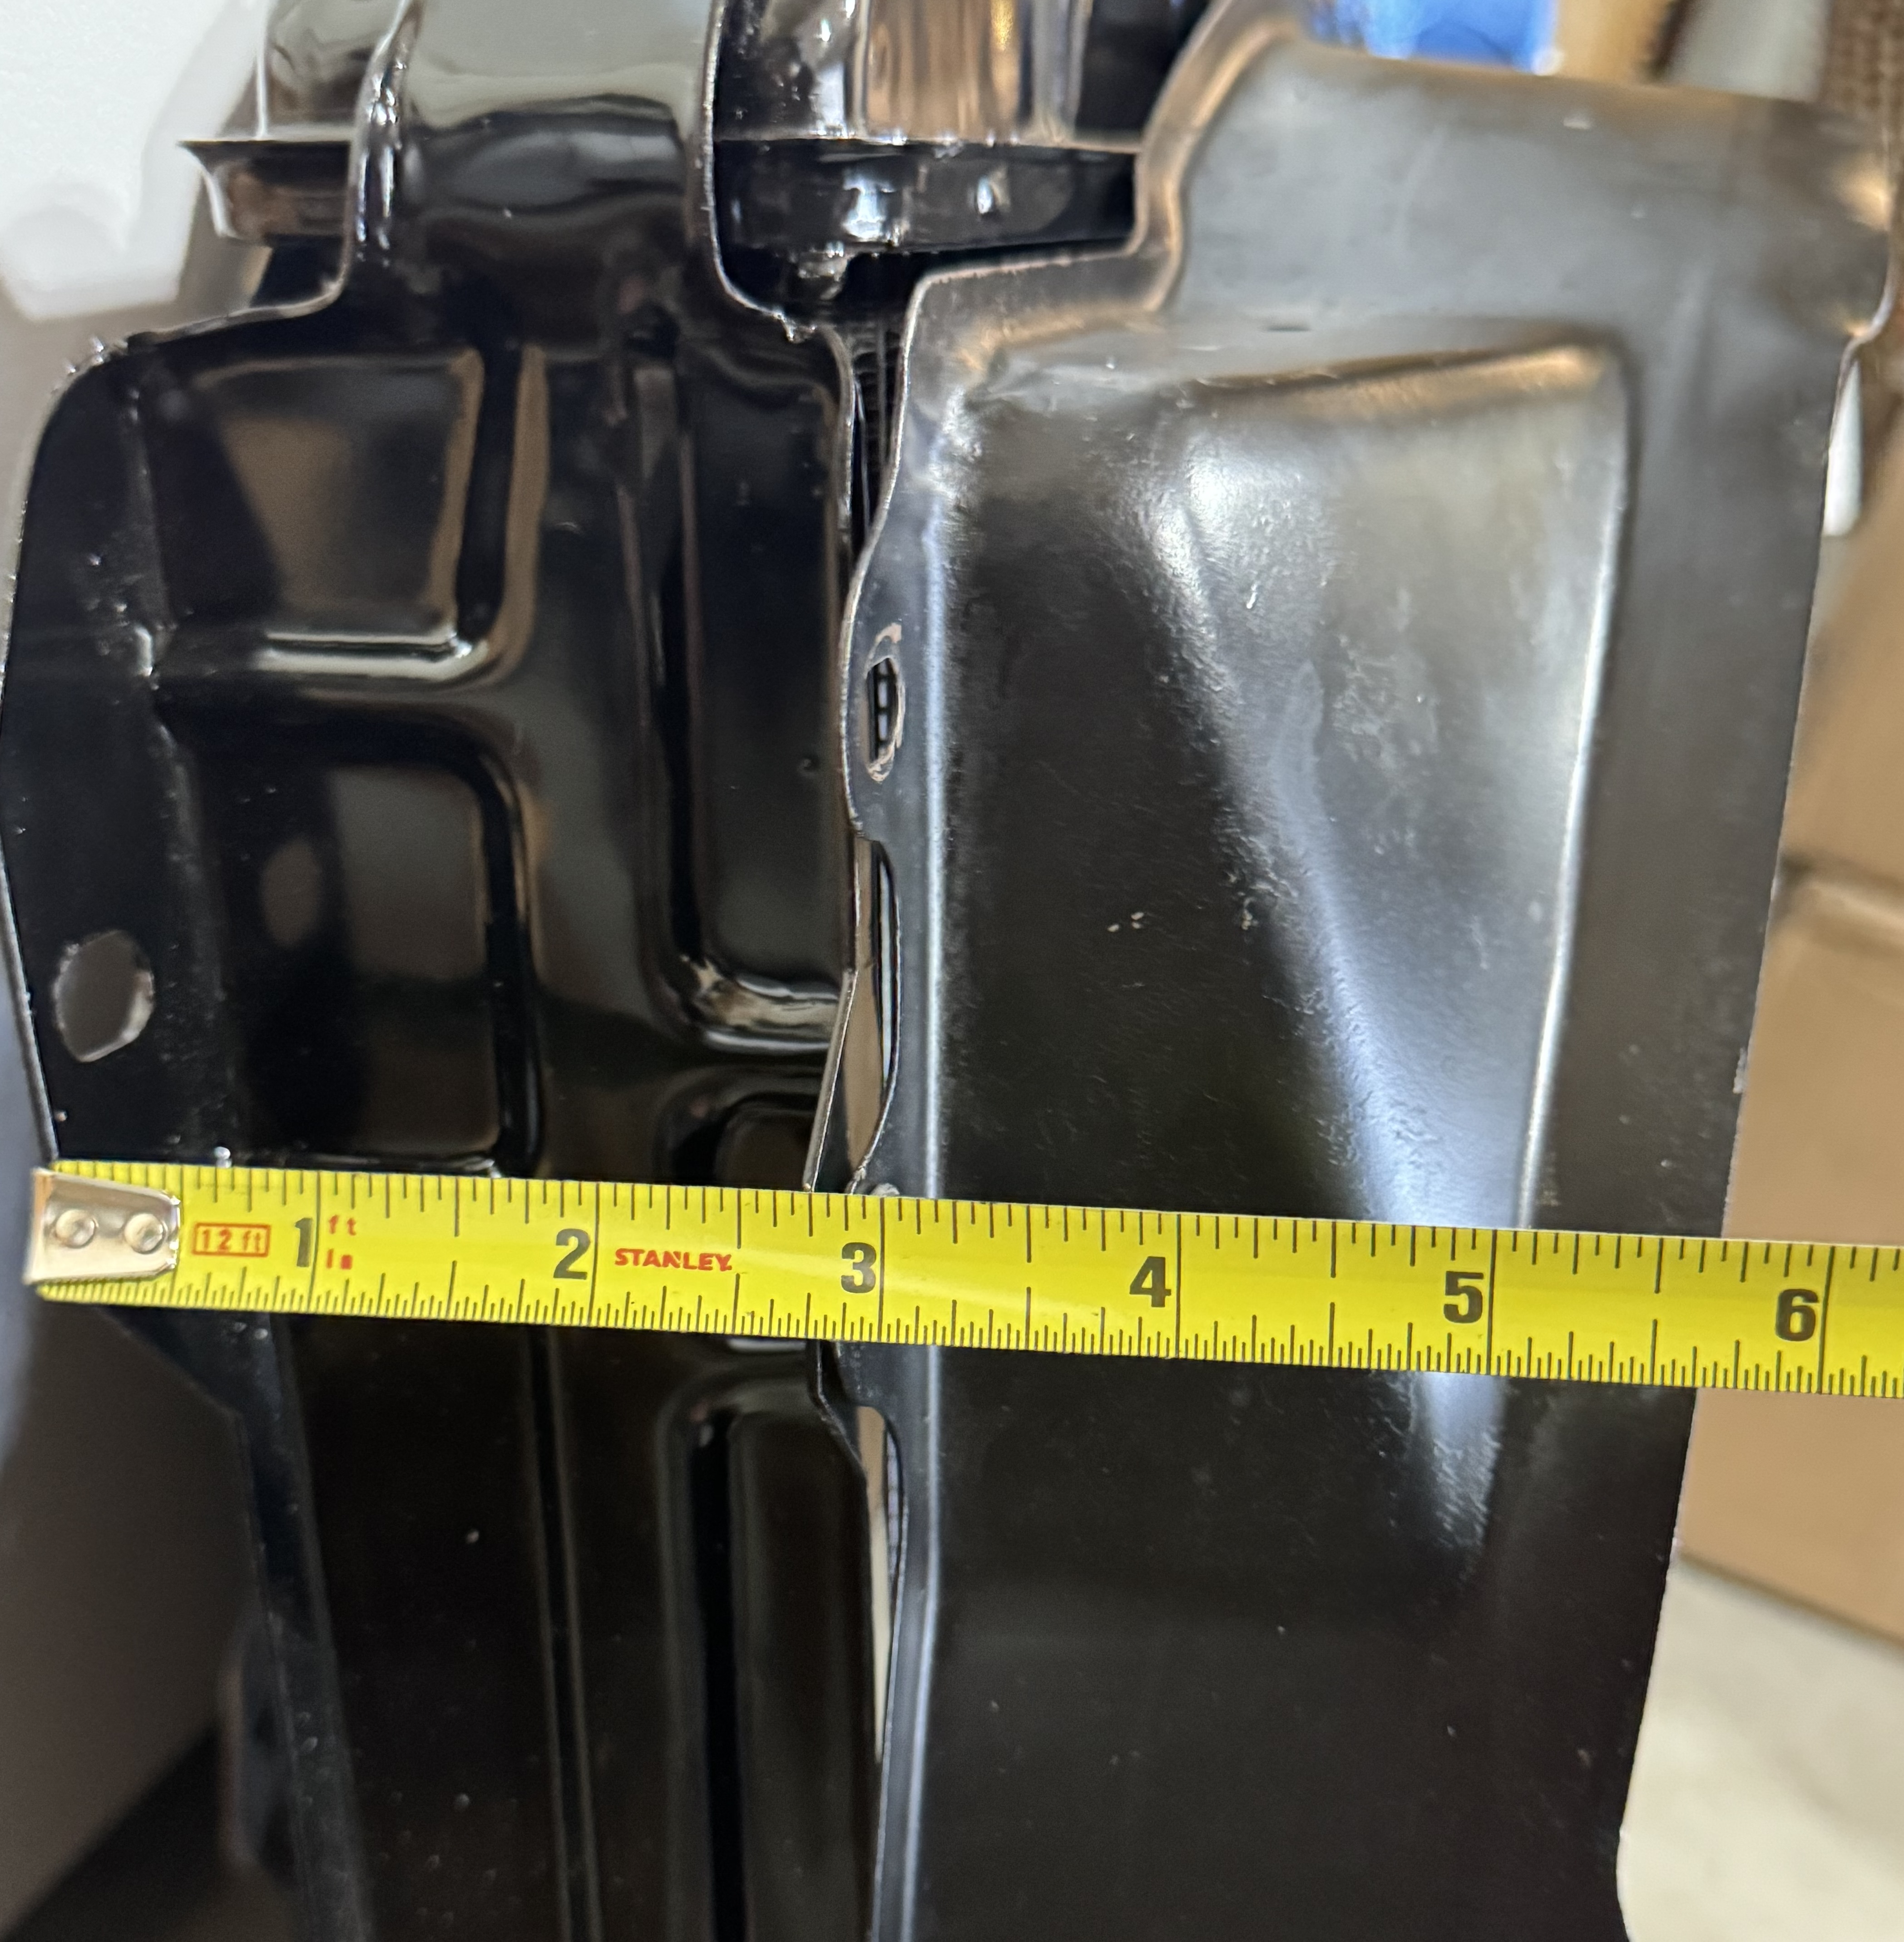
The combination of these two issues meant that the assembly was about an inch thicker, and would not fit inside the engine bay without interference. It was time to modify the fan shroud.
The first step was to trim the sheet metal near the top of the shroud where it passes by the top of the radiator. Marking it with a sharpie or painter’s tape will give you a good idea of where and how much to cut. I used a grinder with a cut-off wheel to make the primary cuts and a Dremel tool with a grinding bit to smooth things out. When the mounting tabs for the shroud mate to the radiator without interference, you’re good to go. And remember, like a good hair cut, you can always take more off, but you can’t put it back. So be a little conservative in your cutting.
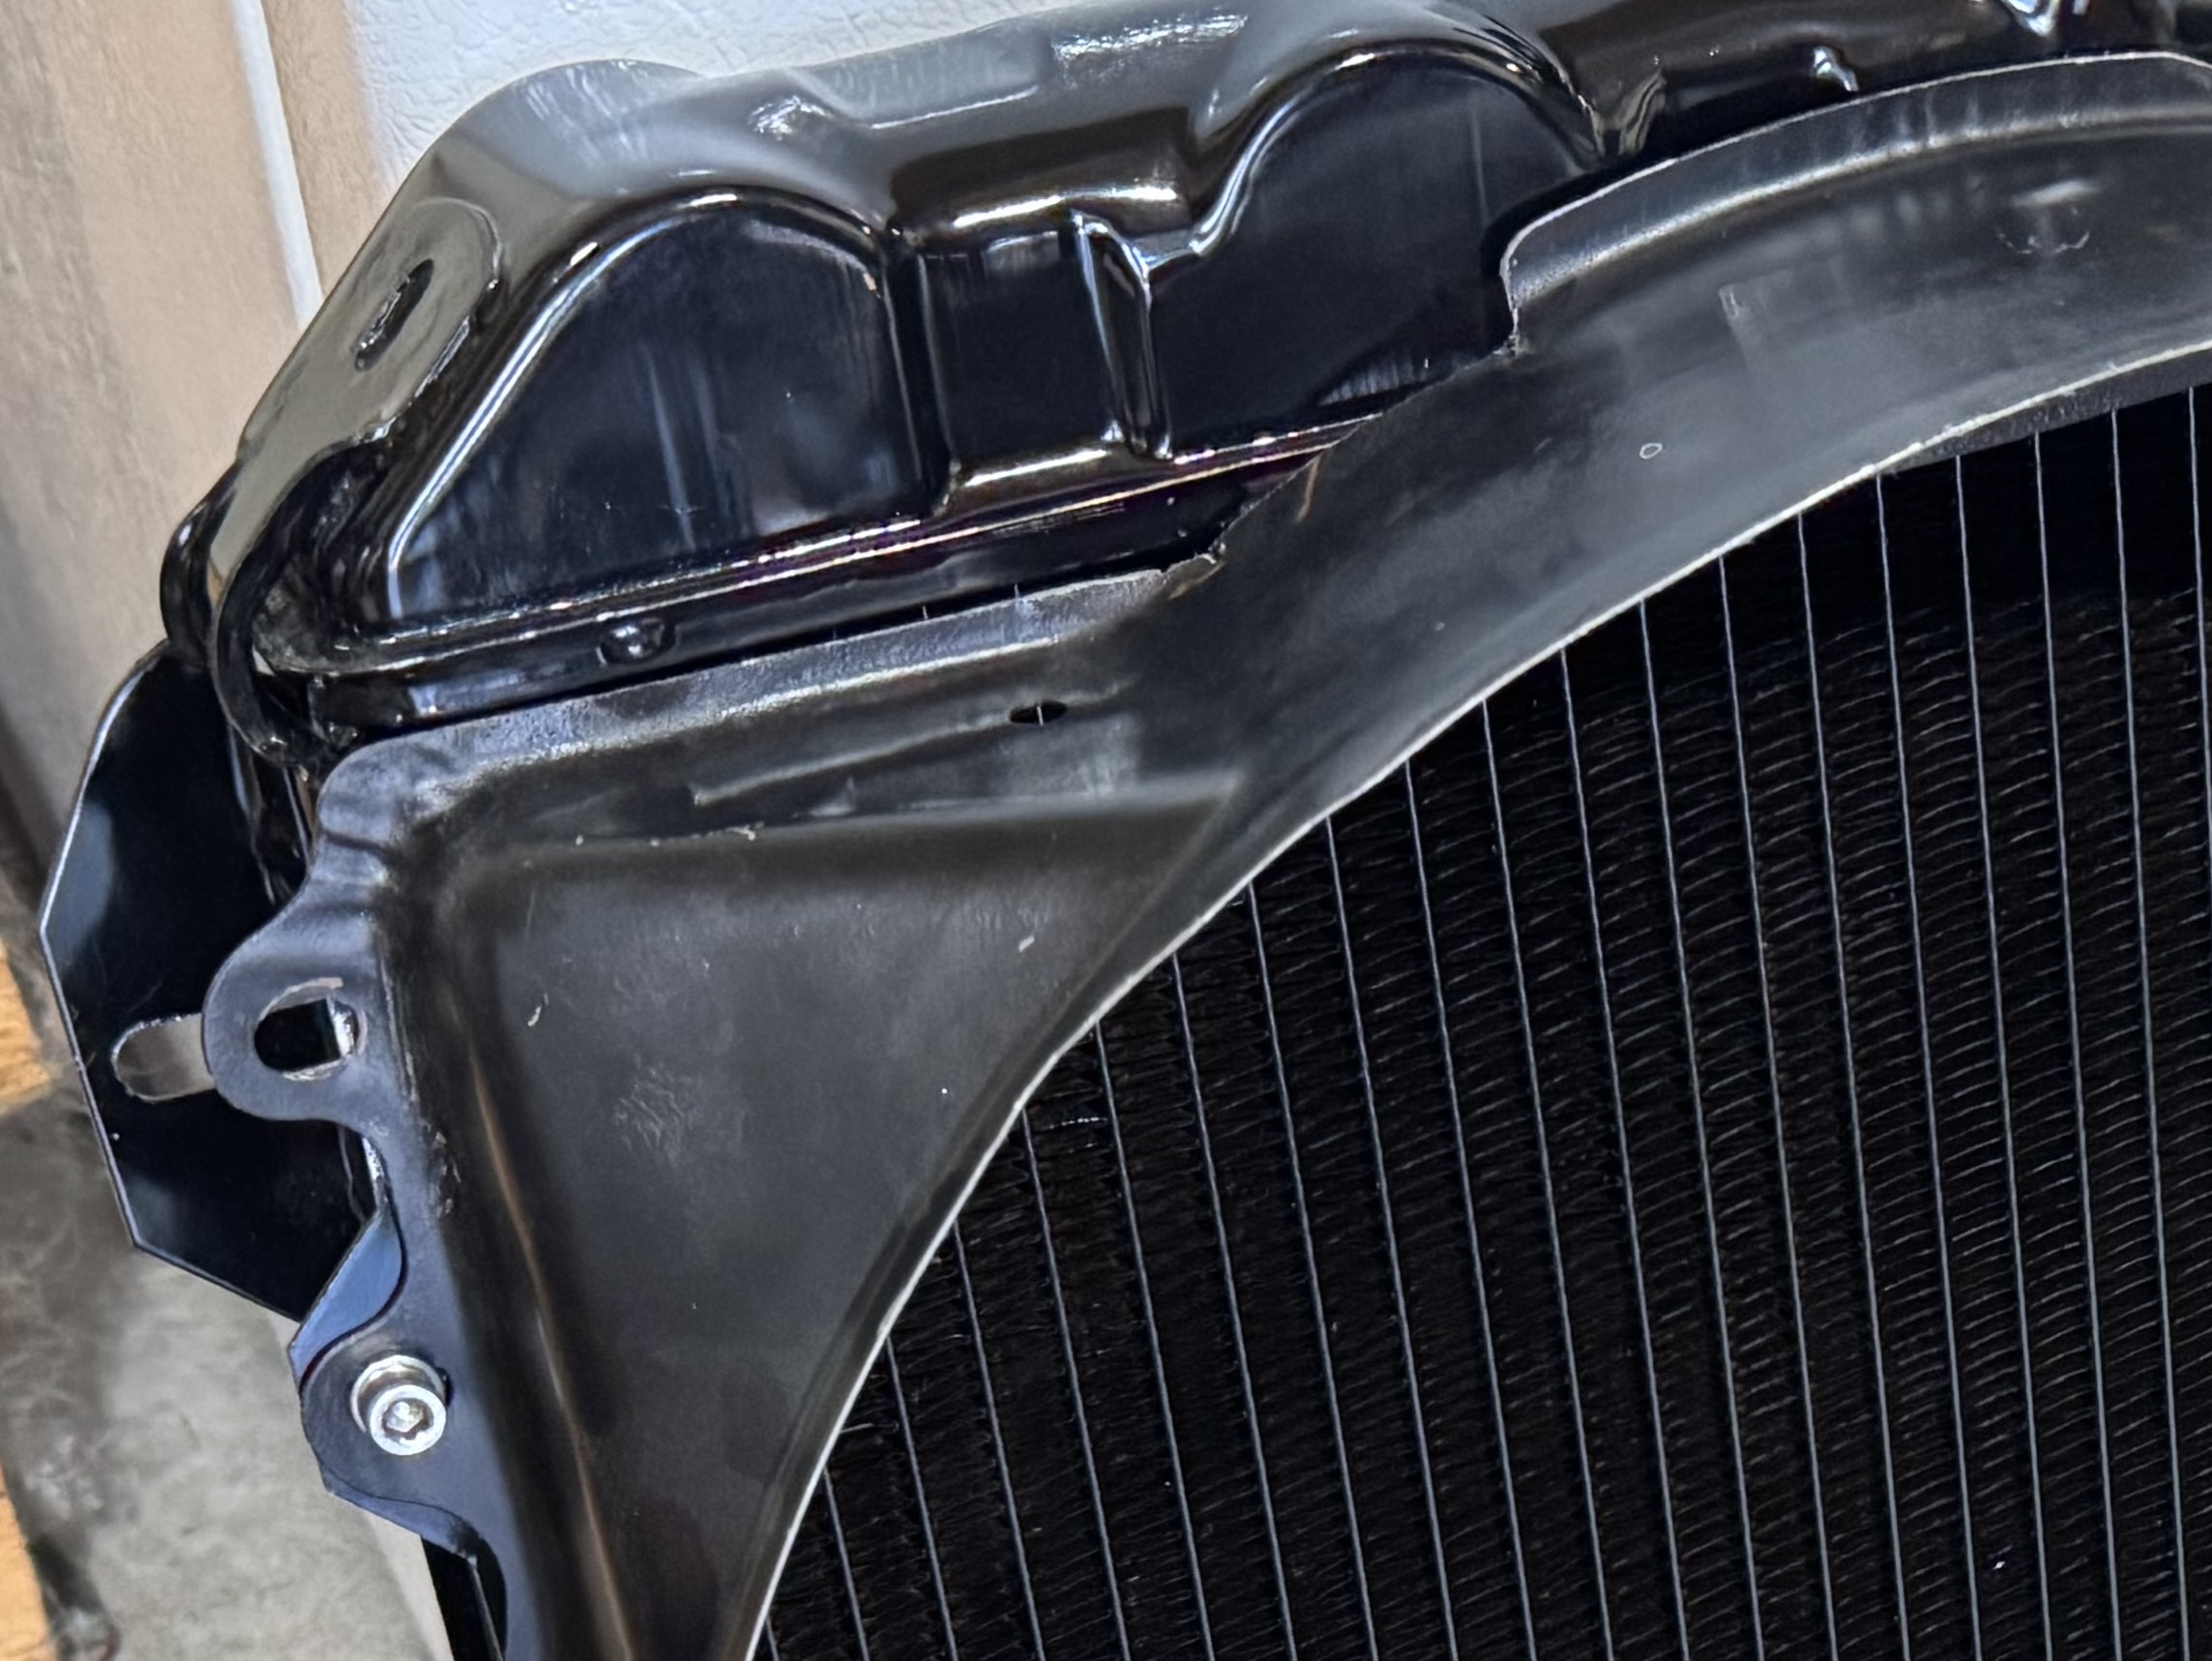
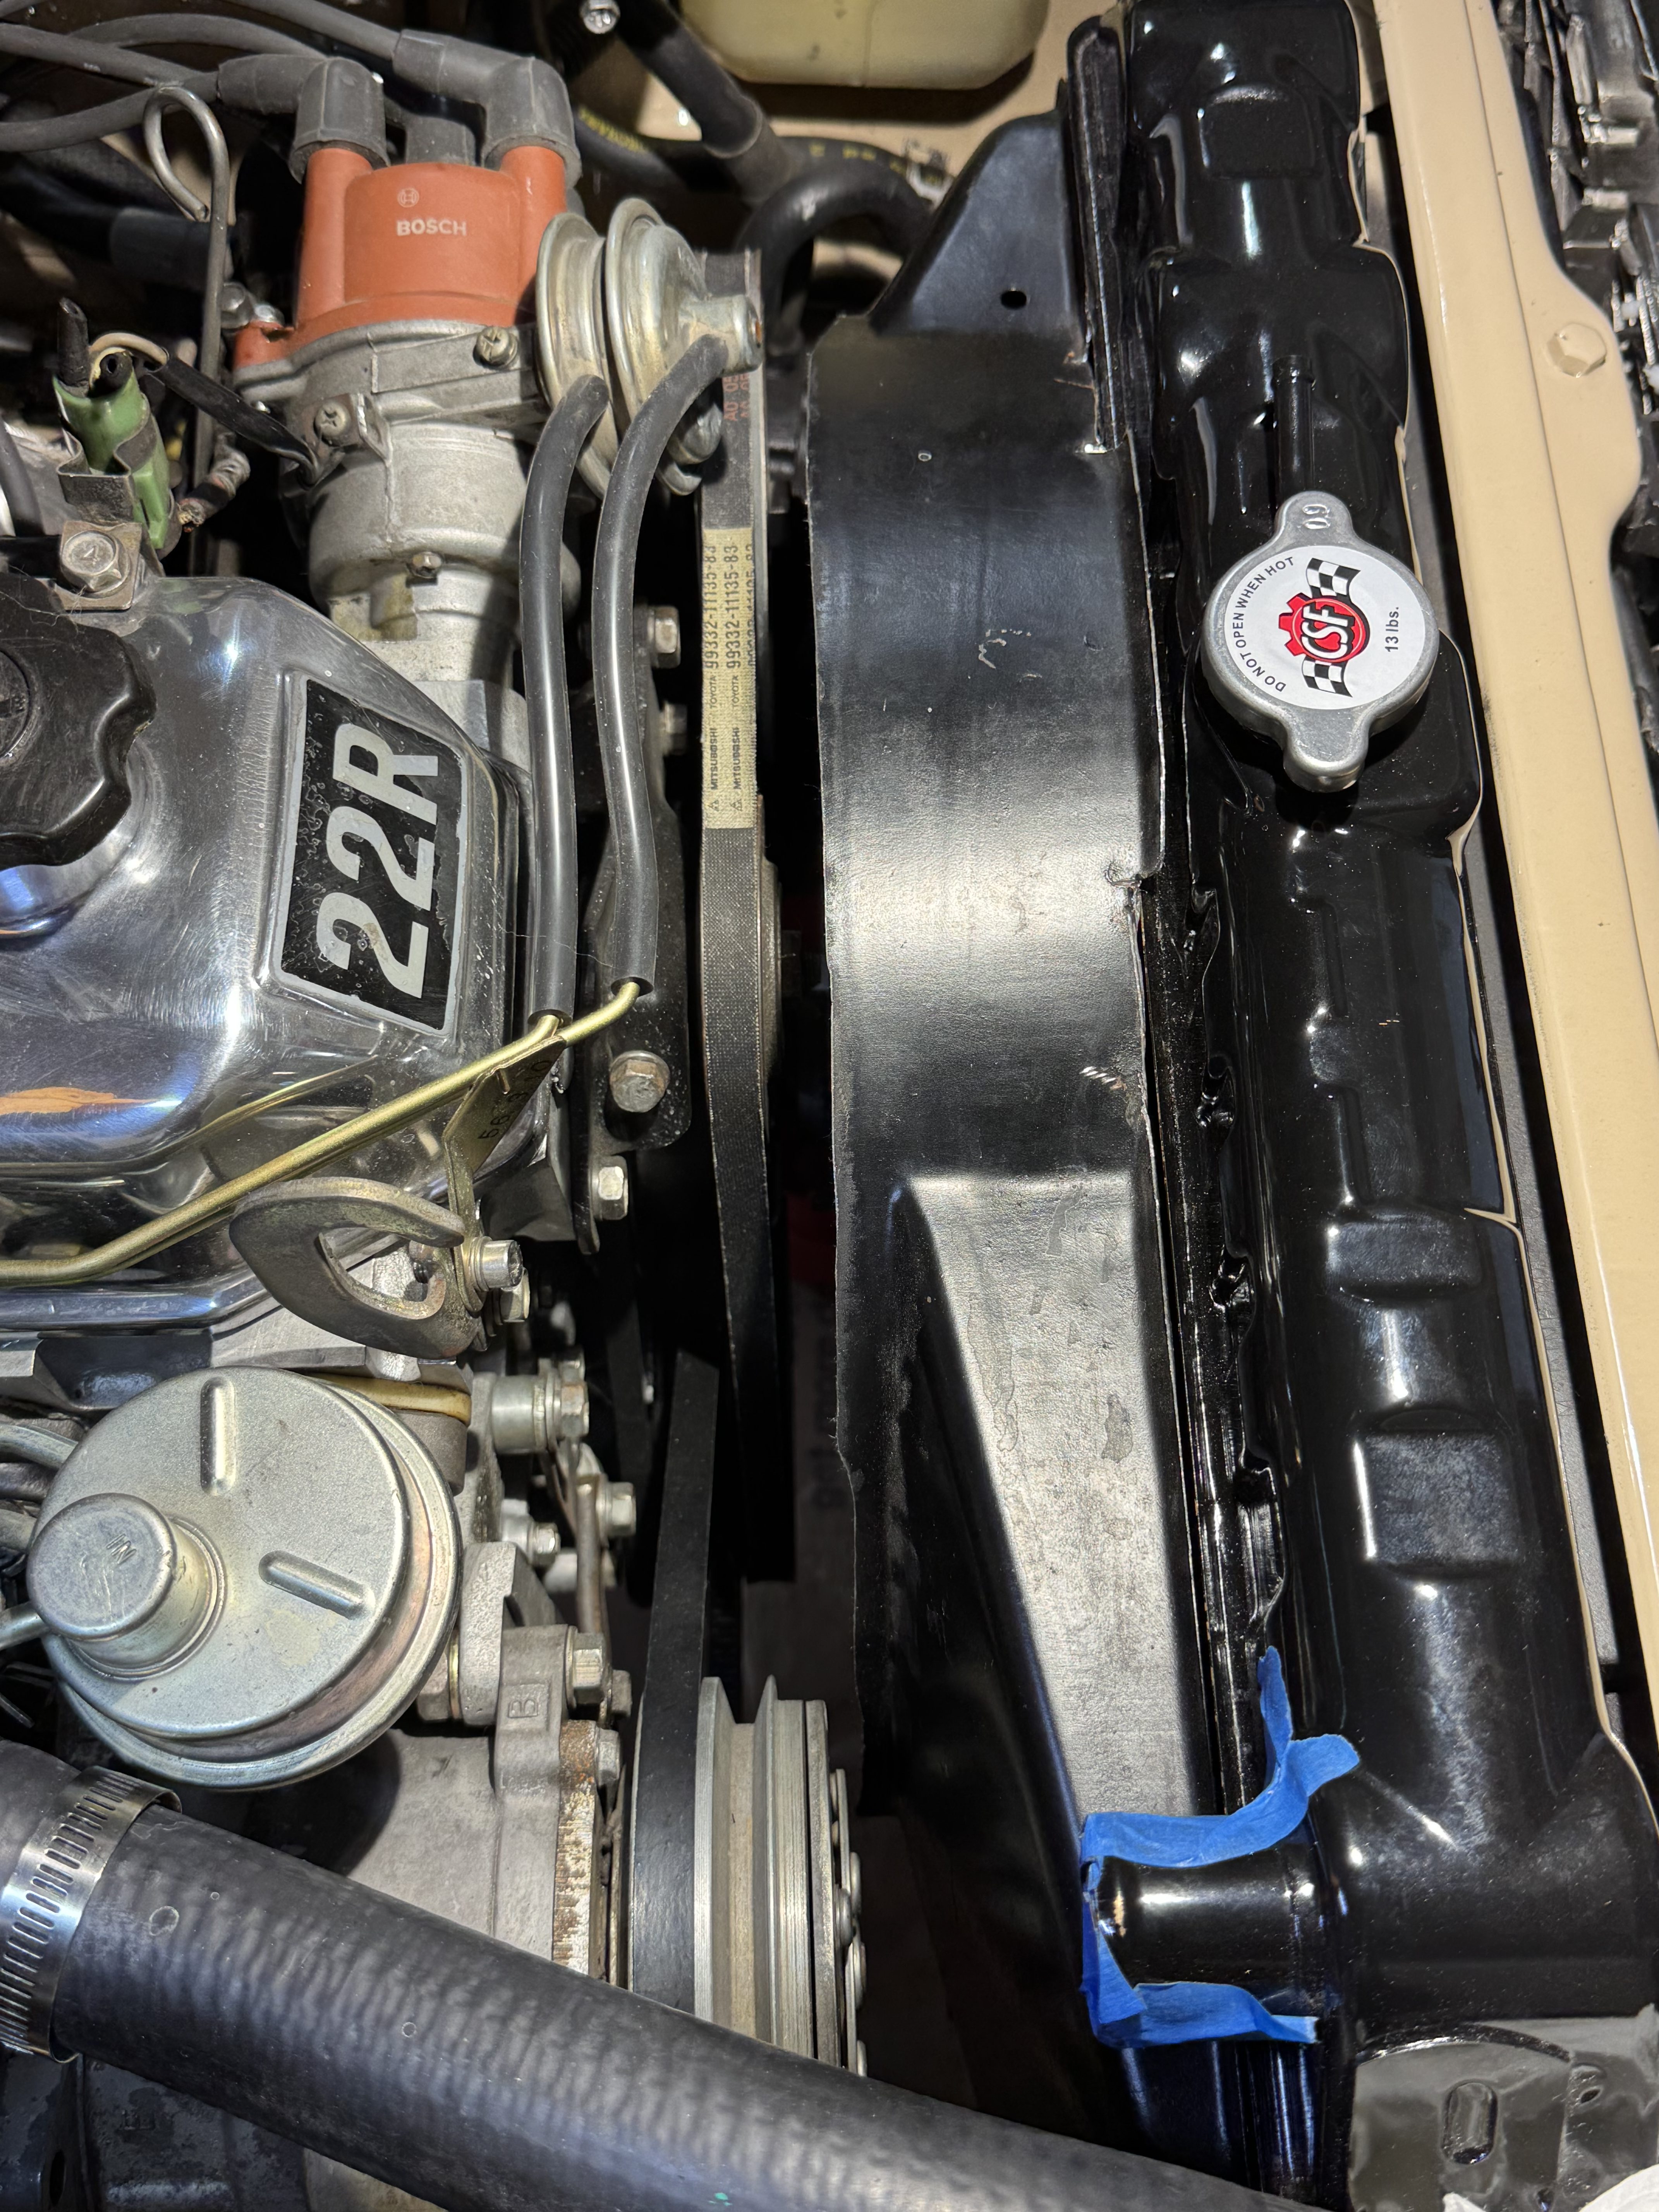
The next step was to trim the middle and upper section of the fan shroud that projects over the fan toward the motor. I marked a line about 3/4” inward from near the top of the shroud, and trimmed accordingly, smoothing out the edges after the trim as I described earlier. The bottom portion of the shroud did not need to be trimmed. Below we see the end result, where the fan shroud has good coverage, but also has sufficient clearance from the belts and the A/C pump.
The Installation
Once things were trimmed up properly, installation was relatively easy. The radiator could be mounted to the front without issue.
Next up is mounting the shroud. With a little trimming, it should be able to slip through the remaining space with barely enough room. I could have hung the fan shroud temporarily over the fan while I installed the new radiator, but I wanted to ensure that it was possible to remove the fan shroud independently from the radiator at any given time.
Being extra cautious in avoiding any damage to the fins of the new radiator, I didn’t think it was going to fit. But with some gentle maneuvering, and manually rotating the fan a bit as I lowered it, the shroud had just enough room to slip through.
The difficult part was finished, and just left me with tightening everything up, checking clearances and reconnecting the hoses. Since the radiator was a bit thicker, I did have to trim about a half inch off of the bottom radiator hose recently installed. Once the radiator was filled backup with a bit under 2 gallons of 50/50 water/coolant, I burped the system using a radiator funnel kit, and it was ready to go.
Summary
With some careful trimming of the fan shroud, the CSF 2314 dropped in nicely and works great. The truck runs cool, and I have peace of mind knowing the old leaky radiator is gone.
– Pete