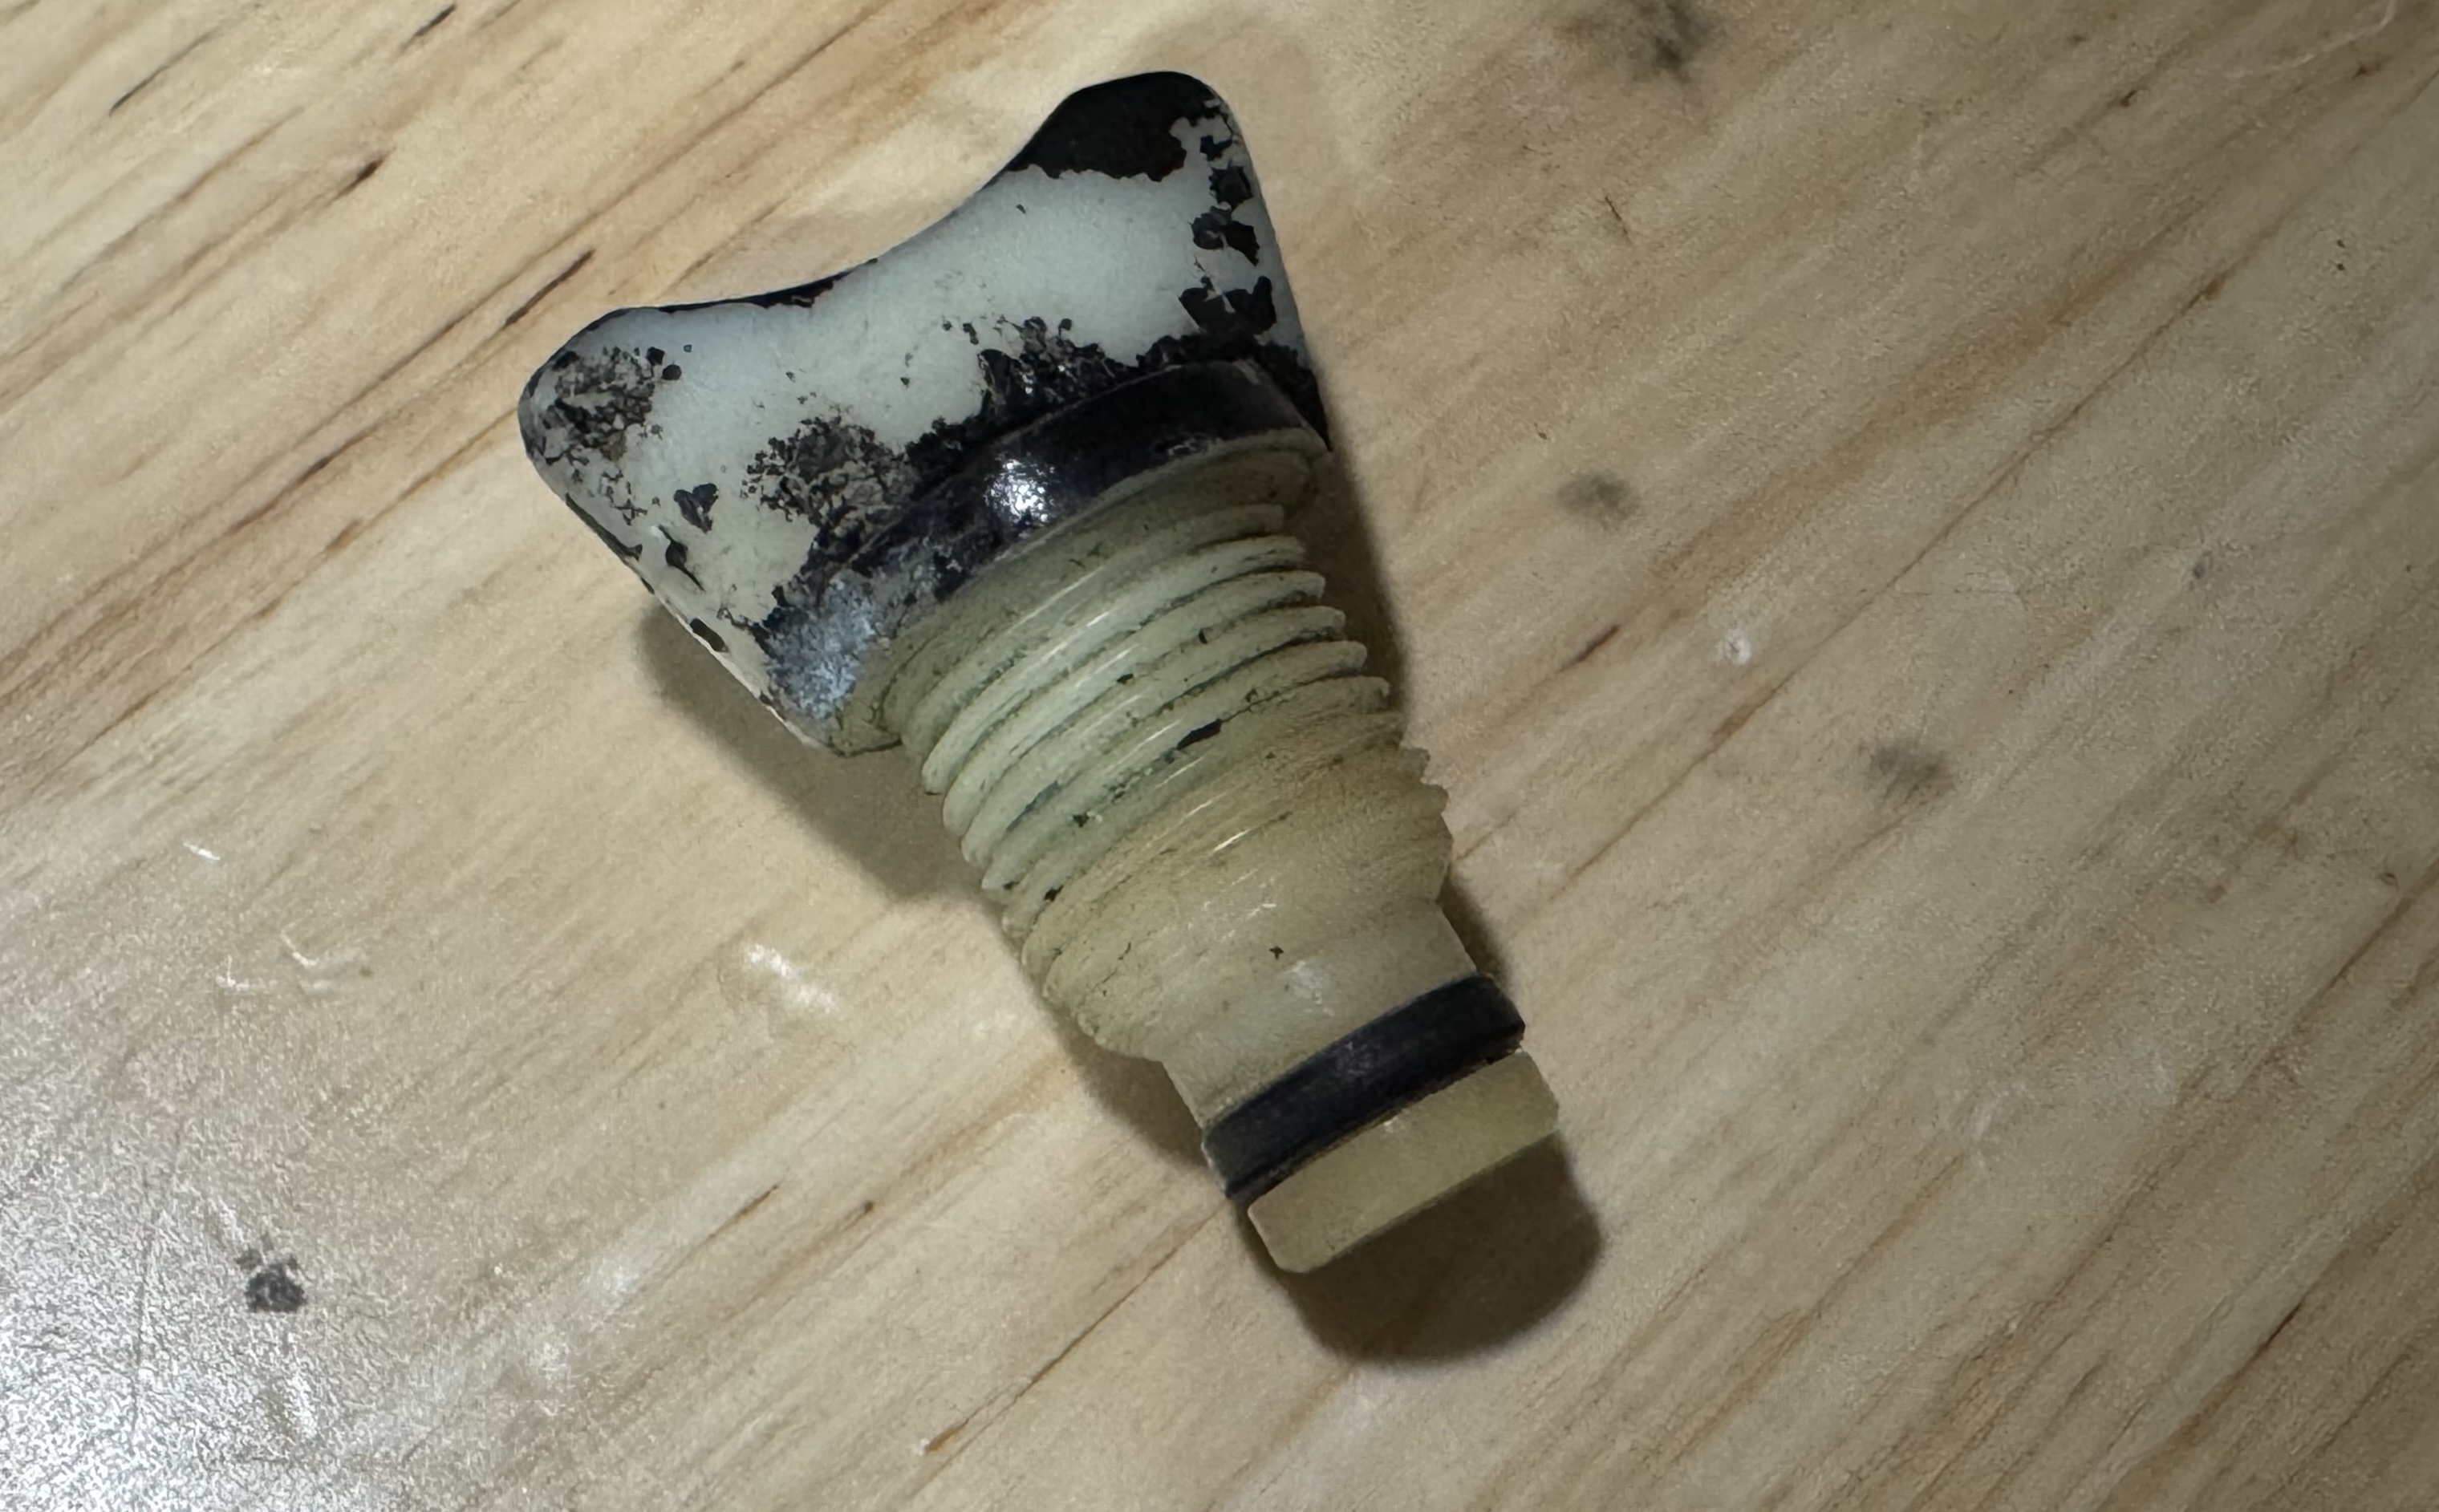
Sometimes you have one of those “one step forward, two steps back” type of days. This accurately describes the moment I snapped off the brittle old “Bimetal Vacuum Switching Valve” (BVSV) on my 1982 Toyota pickup. As described in my post: “Chasing Down a High Idle in a 1982 Toyota Pickup – Vacuum Lines” My efforts to find and fix a vacuum leak resulted in a self-inflicted failure of my BVSV. No time to whine though.
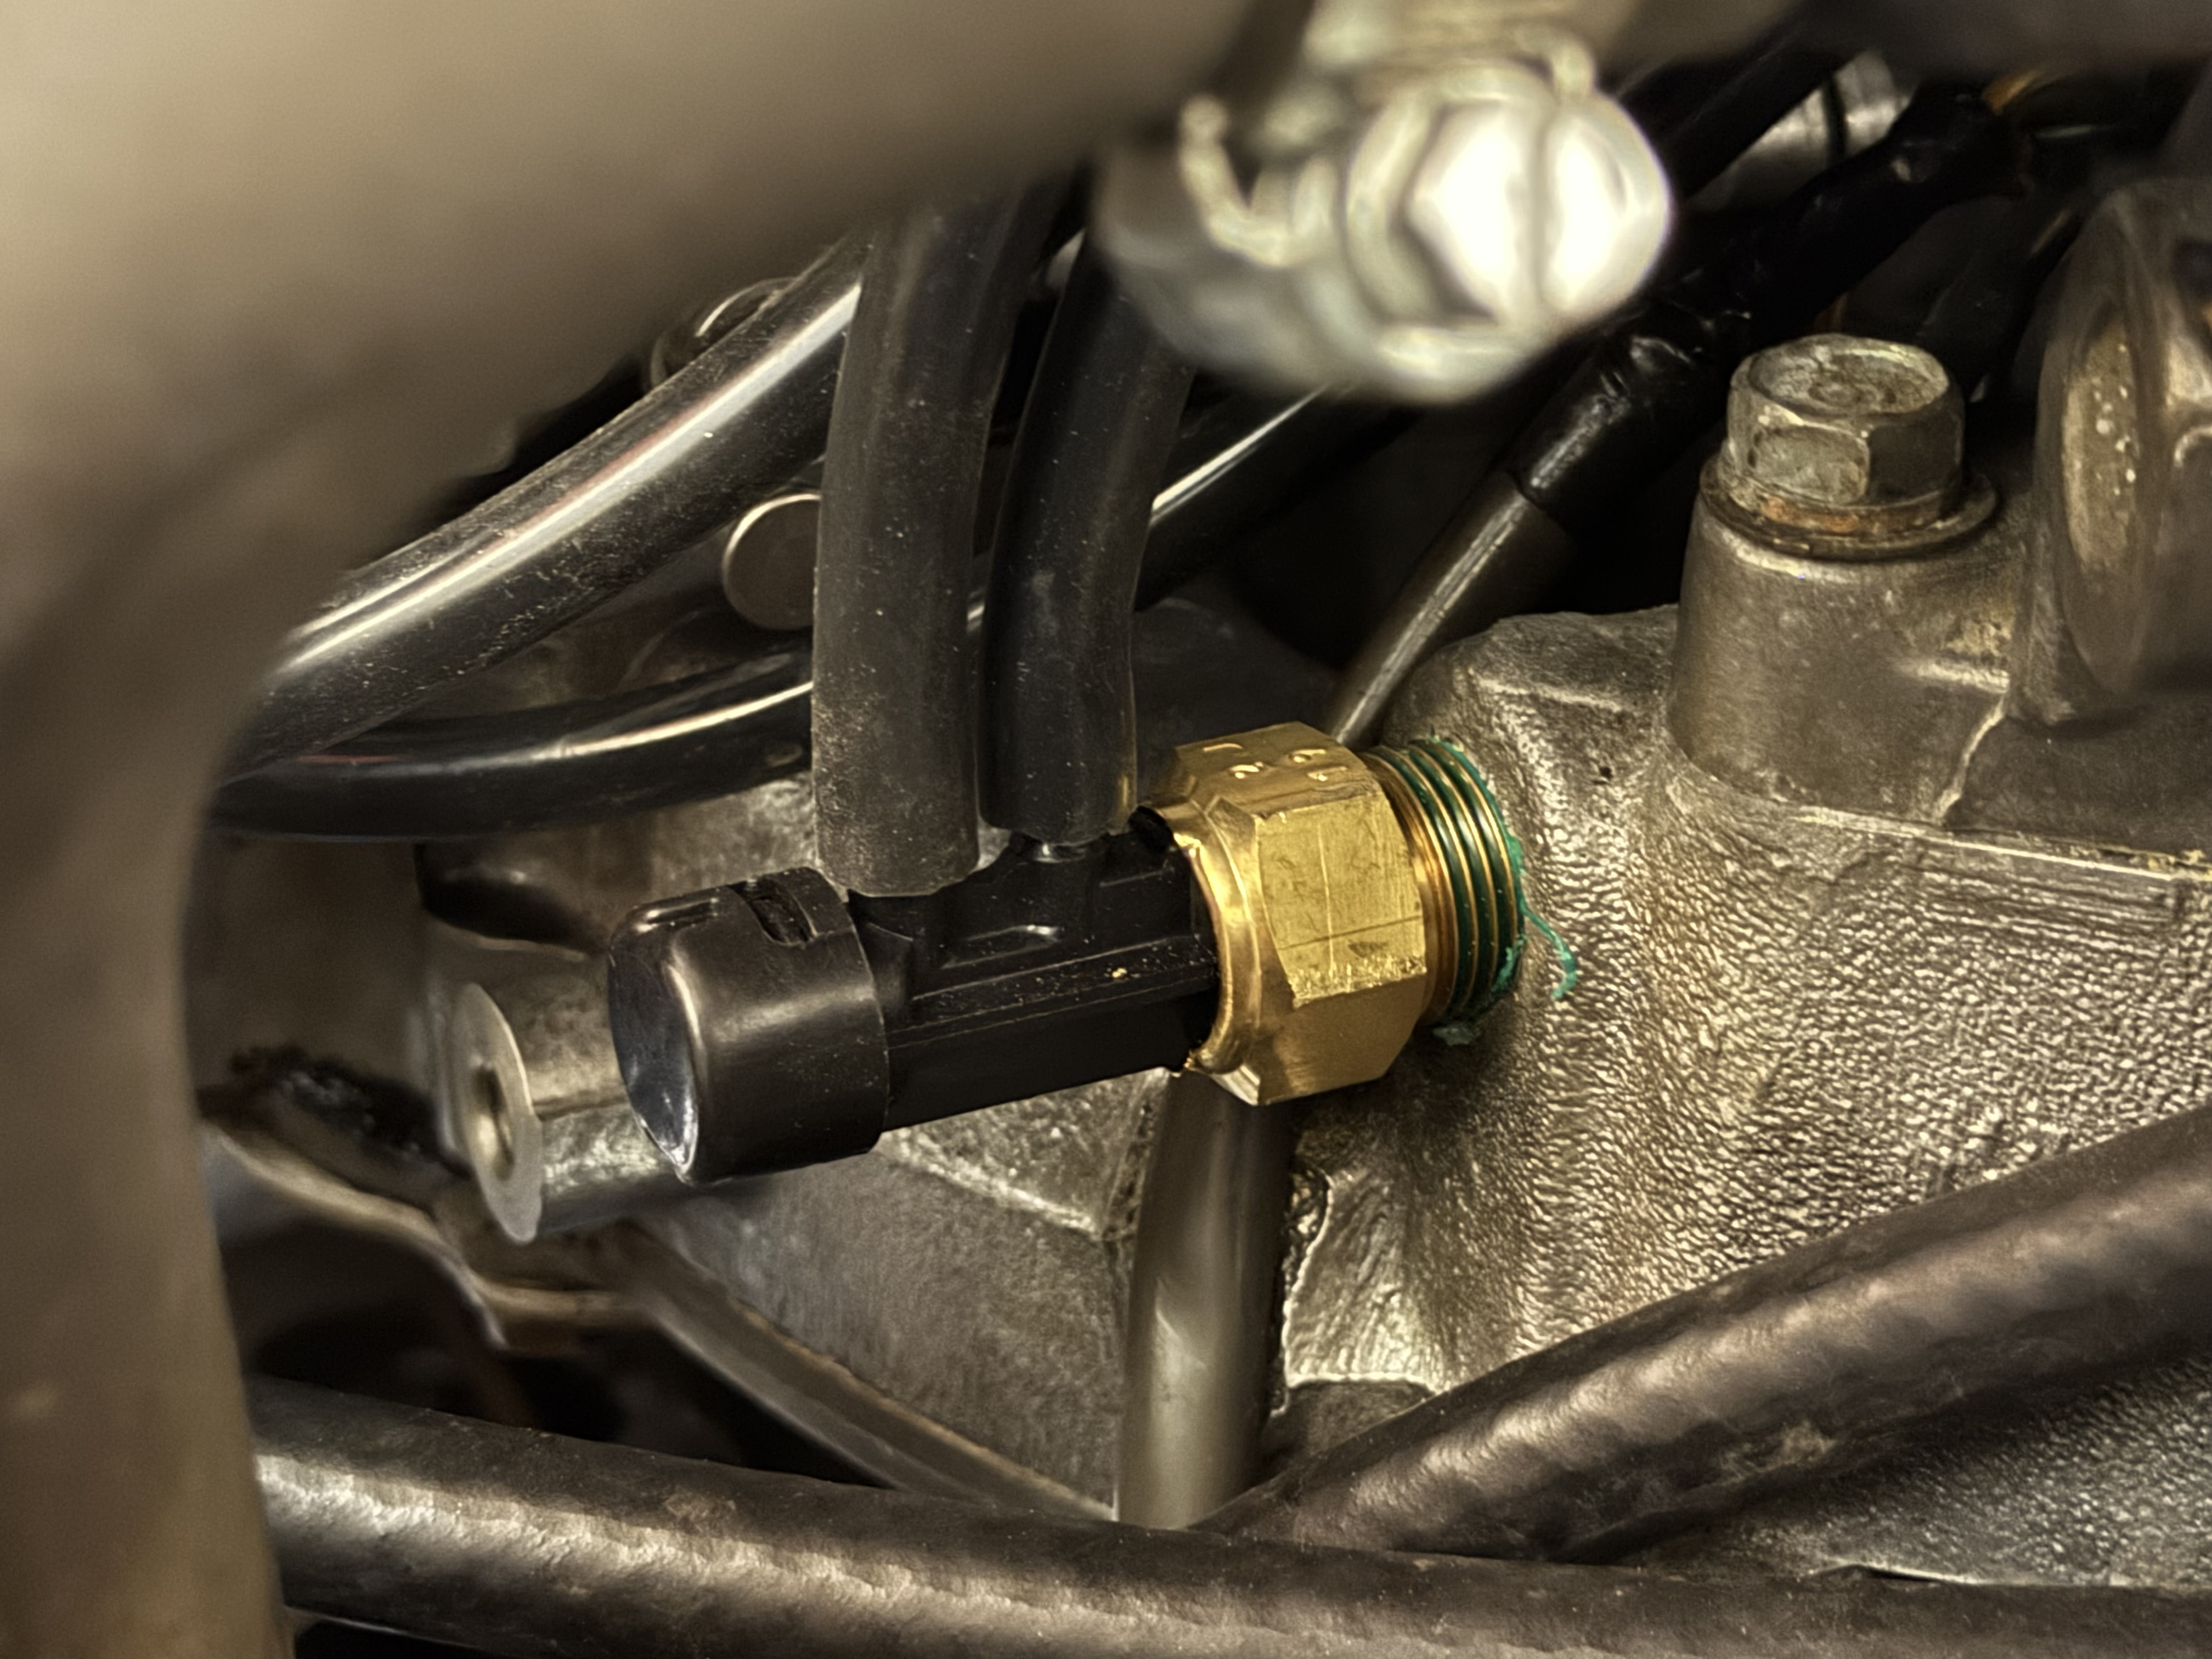
First up, ordering the correct part. There appears to be a few different options here, but I chose to order it directly from a Toyota dealership. It is under “Bimetal Valve Assembly #2 (#25820-13020)”. You might see some references to a “temperature vacuum switch” but most of the documentation and the replacement part does seem to stick with “BVSV” as the term. There are other thermal vacuum switches on the motor that look similar, but this one in particular is near the front, passenger side of the motor, and screws into the thermostat housing (aka “water outlet”) where the coolant runs through the water jacket. It has two nipples for vacuum lines, and its objective is to monitor the coolant temperature, and to change and/or stop a vacuum pathway as the coolant reaches a desired temperature. The BVSV typically controls the choke breaker, which in part manages the choke position.
This particular BVSV ordered from Toyota already has thread on the threads, so there is no need to purchase anything extra.
Removal and installation
If you haven’t done so already, now might be a good time to replace the connecting vacuum lines that will be used with the BVSV with new silicon-based lines.
- Remove the air cleaner assembly just to give yourself more room to work with.
- Mark the two vacuum hoses going to the existing BVSV, so that you don’t get them mixed up later.
- Remove about 1 liter of coolant from the radiator, using the radiator drain cock. If you don’t do this step, you’ll have coolant coming out of the hole when the old BVSV is removed.
- Note, and even take a picture of the depth that the existing BVSV is screwed in. This is important, as you’ll want to screw in the new one to the same depth. Since the nipples on the BVSV will orient upward, making sure you know haw far it should screw in will save you from over tightening issues, and avoid backing it out that may compromise the thread sealant.
- Install new BVSV. With the thread sealant, it requires some effort beyond hand tightening to get in screwed in. Just make sure it isn’t cross threaded. Tighten with a wrench until the nipples point upward, and the remaining threads showing matches approximately what you had with the old installation.
- Reconnect vacuum hoses to new BVSV. I recommend providing a bit of support with your other hand under the BVSV to minimize stress on it while you are securing the new vacuum lines.
- Reinstall air cleaner assembly, and refill your radiator with new coolant.
- Start it up, and verify that it is not leaking
The great news that mine installed without any issue, and gave me some relief that I wasn’t driving around with plastic that predates the fall of the Soviet Union.

The bad news is that the drain cock plug used for draining coolant from the radiator had also seen better days, and wouldn’t stop leaking after I retightened it. This is the old drain cock, and you can see the old rubber washer is pretty worn out.
So I ordered a new drain cock plug (Part Number: 90910-09054) from a Toyota dealership. As silly as it may seem, this plug does not come with the necessary rubber washer, so I picked up a pack of rubber washers that are appropriately sized. (M1.9×6.8 Viton O-Ring, 75A Shore Durometer, Round, Black, 6.8 mm ID, 10.6 mm OD, 1.9 mm Width). The size of this rubber washer is critical. If it is any less than a ~10.6mm outside diameter, it won’t seal like it should. But I can verify that the washer in the link provided works well.
Replacing the drain cock plug is pretty straightforward, but does require more draining and refilling of the radiator. With that significant of a swap, you will need to bleed the coolant system. With radiators, this “burping” process removes any trapped air pockets from the coolant after it has been refilled. Systems meant to push fluid usually do not handle air all that well, so it is a pretty good practice for a lot of maintenance tasks.
Alright, back to the main task at hand, chasing down a high idle.
– Pete